Warning: this is a long, slightly technical blog that is maybe only interesting if you are considering changing your boats windows.

Rustler 36 were built with glass windows in an aluminium frame. The aluminium frame was screwed in to the coach roof with steel screws which threaded in to steel cups on the inside. It appears that the holes for the windows in the coach roof were cut by hand and are a little too large in places and a little too small in others. The overlap of aluminium over roof was insufficient and made worse by holes being drilled right on the outside. The holes for the screws were drilled in the frame and roof by hand. The frames were sealed to the roof with a very thin layer of sealant allowing insufficient expansion. The system is less than perfect and on Artemis we had the following problems:
- water leaked between the glass and the aluminium frame.
- water leaked between the frame and the roof
- water leaked through the screw holes
- corrosion between the screws and the frame “ate” the frame so that water could leak round the holes. It also destroyed sections of frame.

Various people have removed the windows and frames and sent them to be refurbished and then reinstalled them but we felt that this would just get us back to a (temporarily) non-leaking but still fundamentally unsound system. We asked for and received lots of good advice from lots of people and decided to replace everything with a single piece of polycarbonate per window. We were lucky to have two shipwrights and an engineering plastics expert on hand when we started which was very comforting when you start to pull your boat apart.
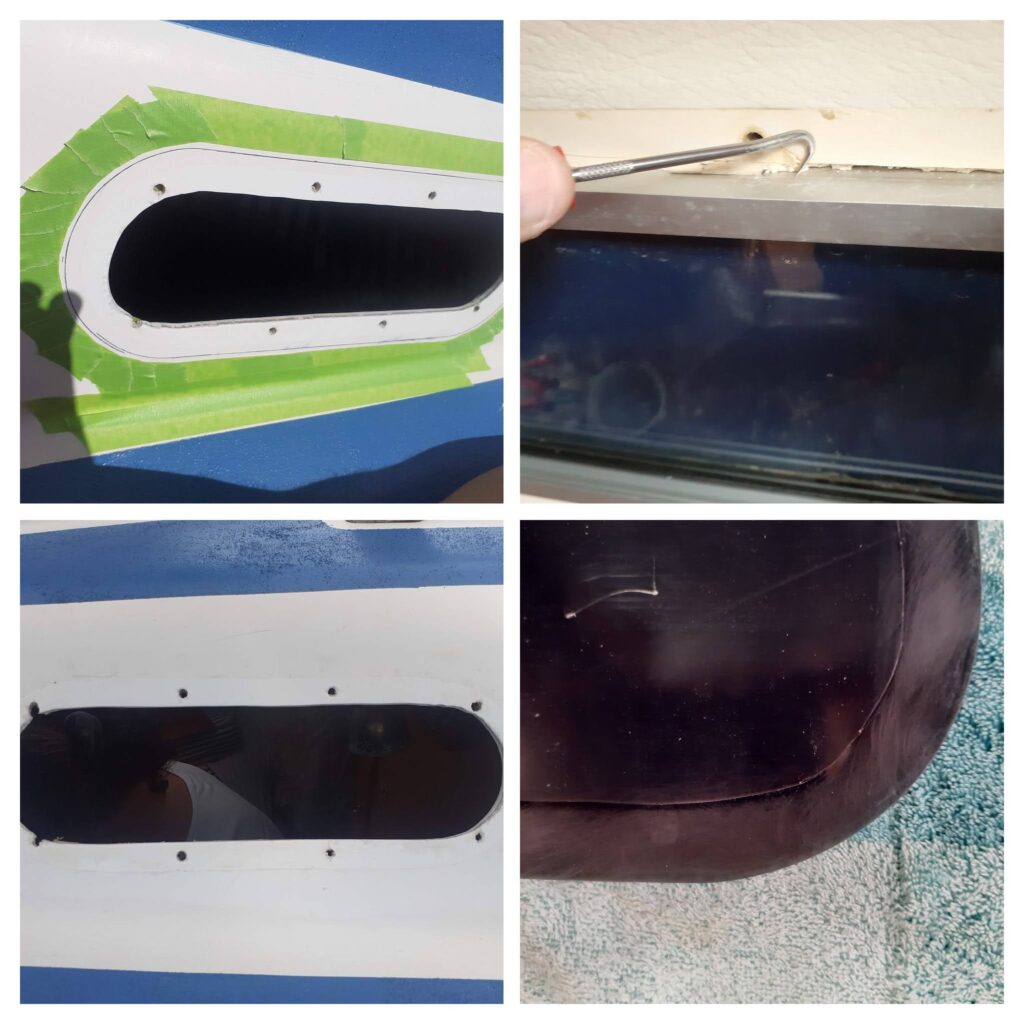
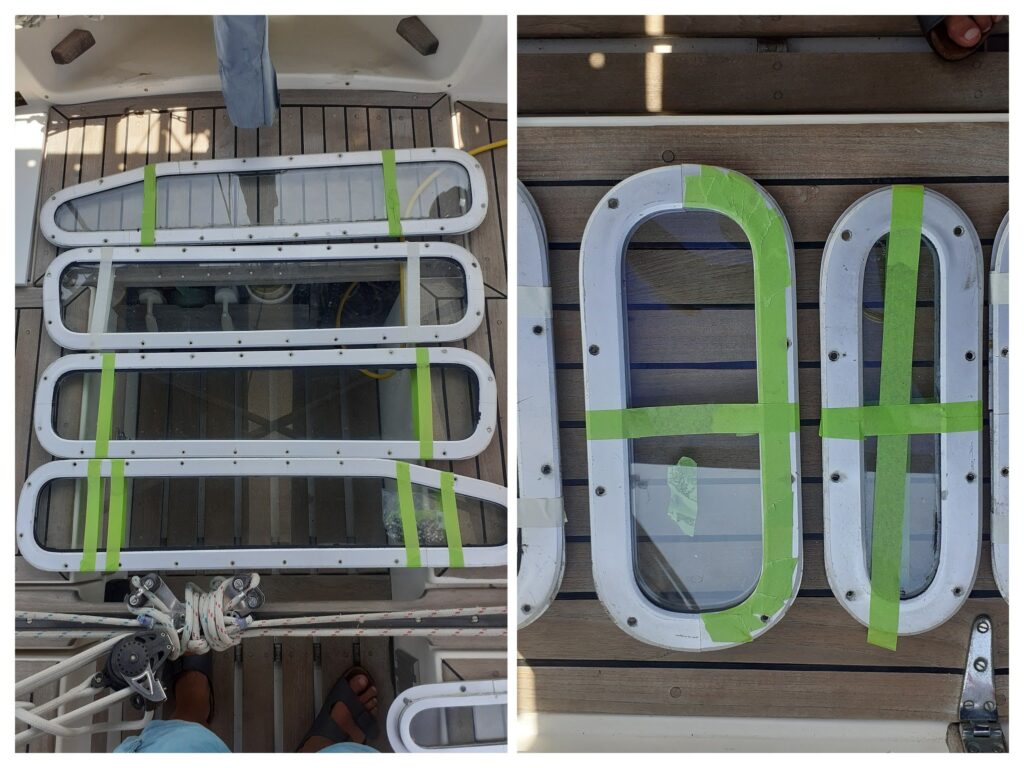
We had been told that, after thirty years, the windows would just fall out. This was not true. We had to unscrew each screw and drive it out with a hammer. We then had to coax sealant out from between the roof and frame with a set of small picks until a part of the window would move very slightly. We then used metal and wood wedges to slowly force the windows out. It took ages.
With the windows out we then cleaned every piece of sealant, corrosion and dirt off the coach roof.
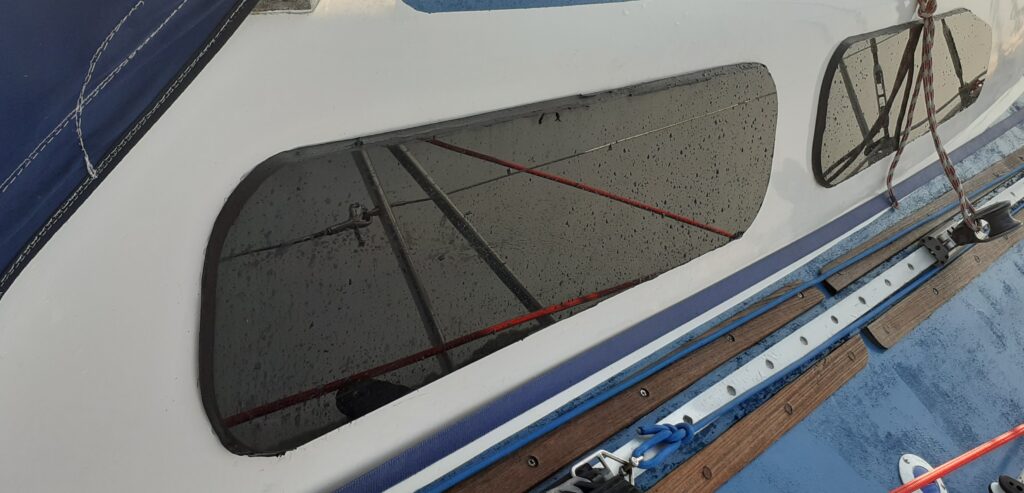
We had supplied the engineering plastics company with the original window drawings and asked them to make the polycarbonate larger than in the drawings so that we would have a 25 mm overlap. We also decided to go with tinted material. It keeps the boat a little cooler and provides more privacy.
We held the polycarbonate over the hole and drew around it inside and out. Next we masked up around the outside leaving about 5mm around the window. Next we lightly sanded the GRP and then cleaned it again with meths. On the inside of the window we cut the protective film following our line and pulled off the film around the edge. We then lightly sanded and meths cleaned the exposed polycarbonate.
We used double sided tape just outside our line to provide an instant bond. It is vital that this tape is approved for use with polycarbonate. The chemicals in some tapes will craze the polycarbonate and then there will be no bond. Next we applied Fix200 around the edge to provide the final adhesion and seal. We first “painted” a thin layer of Fix200 to the polycarbonate to ensure that no white hull would be seen and then filled the area with more than enough.
Finally we removed the protective tape from the double sided sticky tape and pressed the window to the roof in exactly the correct place. The tape held it immediately in place and we left it under a tarpaulin for three days to cure without direct sunlight.
Both shipwrights assured us that the Fix200 would hold under any conditions. The plastics engineer told us that, if we did everything properly, then it would definitely hold. The maths says that there is about six times more area of Fix200 bond trying to hold the window on than the area that a wave can push against to try and peel it off. The Internet is full of screws or no screws arguments but we decided to avoid screws as they are guaranteed to leak.
With two windows done and cured, we set sail for Tasmania and thoroughly tested the system. Across the Bass Strait we were as much below as above water and the windows worked perfectly. Now we have all eight technically finished. “Technically” because they are sealed and waterproof but we still need a solution to make the inside look nice.
04.06 2024: the insides are also now finished. We had a carpenter in Papua make us wood surrounds which we glued on with a product recommended by a dutch carpenter. The wood fits well to the inside of Artemis.


 As we near our D-day the pace of the project is picking up and the number of threads we are keeping track of is multiplying continously. Where we once had only one task – “buy boat”, we now have a list of almost one hundred jobs and tasks that are needed to get our boat up to standard and “ready to go”. One of those tasks is to register the boat and this has now spawned a further six tasks. Many of the tasks are delegated but we still need to keep track of who is doing what and expected or agreed deadlines.
 Alii errem dolor et vis. Aliquam euripidis forensibus in eam, iudico feugiat no his, sea ex virtute bonorum scribentur